You have probably had to conceal information in an image on at least one occasion. For example, the tech support guy didn’t need to see your personal data in a screenshot illustrating your issue. Or you wanted to avoid complaints from a passerby in a wedding shot. Or you wanted to show off your ticket to a long-awaited show on Instagram, but do so with the barcode hidden in case someone else fancied going in your place.
Bear in mind, however, that blurred — and even cropped! — images can often still reveal the very data you wanted to hide. Here are five ways you could leak your own private information without even suspecting it.
Mistake 1: Editing images in Office apps
This is a classic way to inadvertently share personal or corporate secrets. If the image is for a text document or slide deck, the most convenient way to edit it is directly in the Office application. Just insert the image, crop the part you don’t want to show, save the document, and hand it over to the boss or client with a clear conscience.
The problem is that this just changes how the picture appears in the body of the document. The original image remains intact! To see the hidden part, all someone has to do is select the image and then the Crop tool on the Format tab.
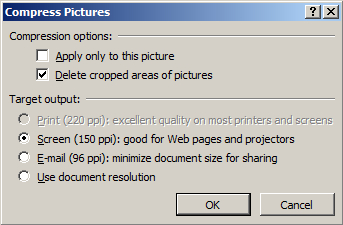
Good news: You can permanently remove superfluous parts of an image in a document using the Compress Pictures button on the same Format tab. Click it and make sure that the Delete cropped areas of pictures box is selected.
As for black rectangles and various graphic effects, these are of no use at all in Office applications. To see what lies beneath, the recipient can simply remove this superficial artwork.
Mistake 2: Semitransparent filling
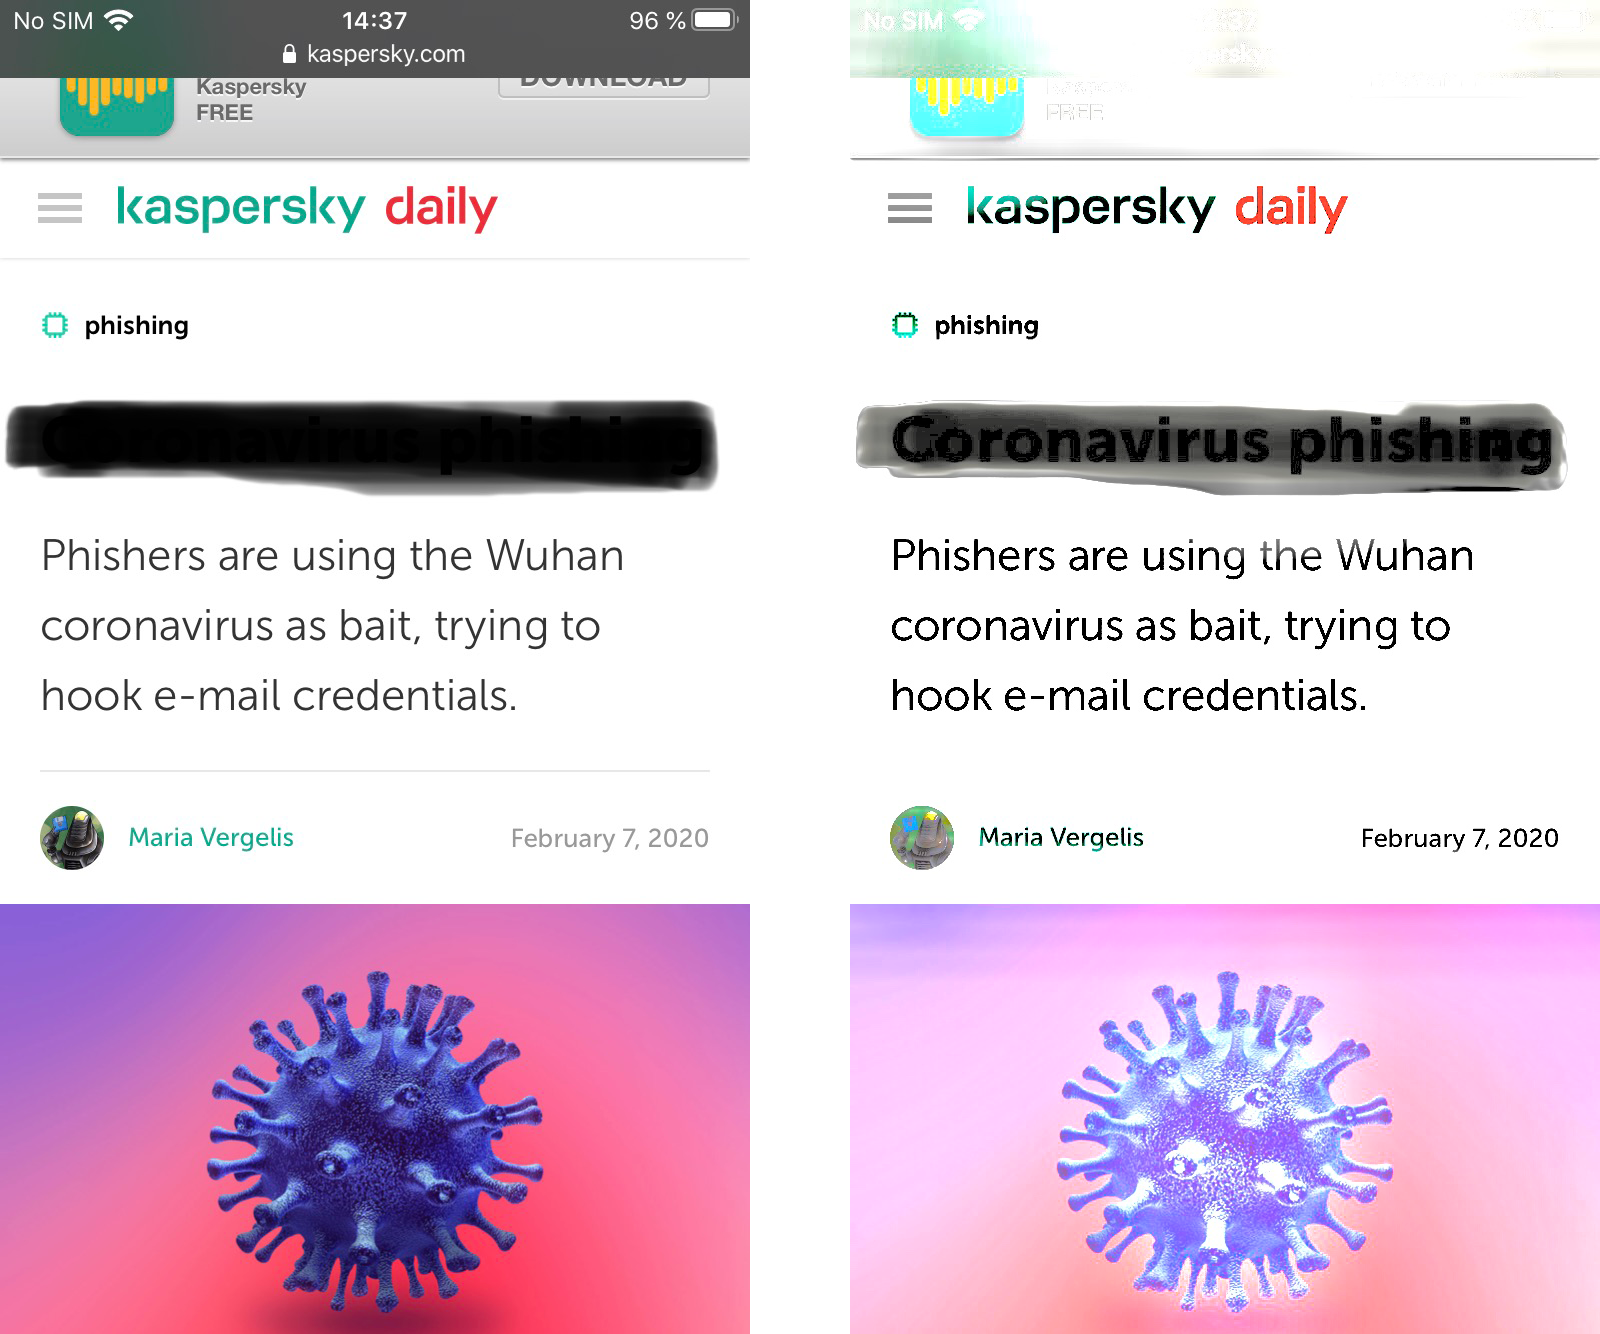
Another handy tool, this time for iPhone users, is the Markup feature in iOS. Want to send a photo from your phone? You can edit it directly in an e-mail or message! And the recipient will not be able to undo your edits. Surely, it’s the ideal hassle-free way to hide information on images?
Sadly not. The reason is that the pen and highlighter tools draw semitransparent strokes. Sure, if you paint over a piece of text a few times, it might look completely hidden. But by playing around with the brightness, contrast and other image settings, anyone can quickly unearth the secret.
It is the same story with semitransparent brushes in image editors. All in all, it is better to make sure you’re using 100% opaque tools to conceal data on images.
Mistake 3: Invisible secret layer
To avoid losing secret information in an image entirely, graphic editors can store it in a separate hidden layer. This is a convenient solution for some images. However, posting a picture with hidden layers online is not a great idea, at least if it is in PNG format.
Here is why. When saving an image as a PNG file, the photo editor combines the layers so that they cannot be unglued; however, the information in the hidden layer does not go anywhere — it is right there in the file. And whereas most programs do not display it, in some, for example, the darktable app, simply opening the picture reveals all hidden layers with nothing overlaid.

The same picture opened in different viewers. The lower part of the image was in a hidden layer that showed through in darktable
Mistake 4: Reversible filtering
Graphic filters that distort the image can also spill the beans. Some displace pixels without deleting them, and it is possible to put them back in place and view the image in its original form.
This feature of filters helped police detain a suspected pedophile from Canada. The criminal posted photos of victims online in which his own face was distorted using a swirling effect. Computer scientists were able to unswirl the images to find out what he looked like. The flip side is that cybercriminals too could use this technique to uncover your secret, after you so diligently tried to swirl it out of view.
Of the various image distortion methods, blurring and pixelization, where image info is turned into a jumble of colored squares that cannot be easily rolled back, are considered the most reliable. That said, machine-learning technologies are getting better at recognizing images even if they’re blurred and pixelized.
And if you break the image into unduly small pixels, thinking that will keep your secret safe, there is a chance that someone could glimpse what was originally there. The easiest way to do it is by zooming out so that the pixels begin to merge back together. Try playing with the image below to get the idea.

When using pixelization to hide image info, be sure to play around with the scale to make certain that it does not appear even zoomed out
Mistake 5: Not hiding it all
Lastly, your secrets can become public knowledge if you leave information that points to them. Carefully painted over your name and profile pic on a screenshot of a social network page, but forgot to hide the address bar? Anyone who wants can enter the address and view your profile. Covered someone’s face with a black rectangle, but left a badge bearing their full name? The subject of the photo will not be difficult to track down.
Moreover, a picture isn’t the only thing that can spill secrets; a file’s metadata can as well. For images, that’s primarily information about the time and place they were created, but in some cases, the metadata includes a thumbnail of the original picture, which shows how it looked before retouching.
So, before posting a photo anywhere, delete the metadata. There are many mobile apps and programs for desktop computers that will clean your photos of unwanted information in no time at all.
Just be aware that malware can masquerade as these utilities, so download the tool only from an official source and avoid granting it too many permissions in the system. And, of course, use a reliable security solution that spots and blocks malicious programs.
Good news for Windows users: You can delete metadata from your images without any extra software. Here’s how:
- Right-click on the file.
- Select Properties.
- In the window that opens, click the Details tab.
- Click Remove Properties and Personal Information.
- Choose whether you want to delete the metadata permanently or create a copy of the file without it.
Bonus track: Whoever seeks shall find
Anyone desperate to learn your secret will try to extract it even from a well-censored image. For example, if you blotted out each word separately, they might try to guess the text by their number and length, or recover a small part of the distorted region that can appear around a black rectangle when the image is saved in JPEG format.
These are complex and highly unreliable methods, so the casual viewer of your Instagram is unlikely to use them. But if the information in question is extremely sensitive, such subtleties should be kept in mind.
How to hide secrets properly
To prevent sensitive info in an image from becoming public:
- Edit pictures in a photo editor and use only redacted images in Office documents.
- Make sure that the tool you use to paint over secret information uses 100% opaque filling.
- If you prefer blurring or pixelization, check thoroughly that the result doesn’t reveal the secret, say, by the shape of the letters.
- Before posting, make sure no other information in the picture could reveal what you want to hide, and thoroughly conceal e-mail addresses, URLs of social network pages, unusual tattoos, name tags, and other such potential identifiers.
- Delete metadata. If for some reason you want to keep it, make a separate, “clean” copy of the file for posting.
- Always think carefully before uploading a picture with sensitive information. Maybe Instagram can survive without a photo of your plane tickets?
 privacy


 Tips
Tips